What are the advantages of a bluetooth mobile printer
What are the advantages of a Bluetooth mobile printer?
1. Simple operation
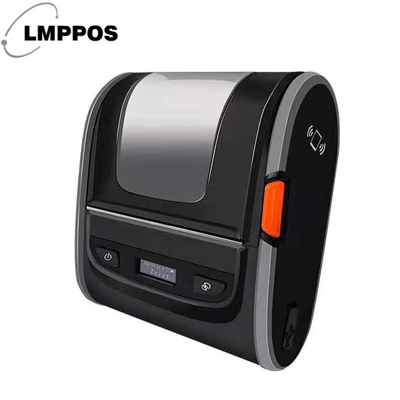
The bluetooth mobile printer can be used in various places and has the characteristics of fast printing speed, simple operation, and convenience. Portable barcode printers generally use large paper storage, simple paper loading design, simple button operation, easy to use, which can greatly improve work efficiency.
2. Easy to carry
Portable barcode printers are also called mobile barcode printers. The big difference from desktop label printers is that portable bar code printers are very light and easy to carry. Generally, they are matched with notebook computers and can complete label printing requirements in environments such as narrow spaces.
3. Strong battery life
The working environment of portable bar code printers is basically for outdoor use, which means that bar code printers still need to work even when they cannot be connected to a power supply, so the printer needs to have long-term printing endurance. Portable barcode printers generally use large-capacity batteries and low-power printing designs to meet the continuous printer needs.
How to install paper for Bluetooth printer?
1. Take out the barcode machine from the packing box and place it on a flat desktop. Do not turn on the power at this time.
2. Connect both ends of the parallel cable/USB cable to the printer and the host computer respectively.
3. Connect the two ends of the power cord to the printer and the power socket respectively.
4. Open the top cover of the printer and press the print head holder release lever to open the print head holder.
5. Insert the label roll into the center hole of the label roll (printing side outward), and then connect the fixing piece to the label roll, and place the label roll in the groove of the label holder steadily.
6. Pull the front end of the label roll from under the print head holder in the direction indicated by the arrow printed on the base, through the top of the pressure bar, and then pull it forward through the label outlet.
7. Adjust the paper guide according to the width of the paper roll to match the width of the label roll.
8. Insert the ribbon rewinding shaft into the empty ribbon paper spool, and insert the ribbon spool into the ribbon spool
9. Pull the front end of the ribbon and pull it back, and pull it forward through the print head holder to the top of the ribbon rewinding shaft. Use tape to attach the transparent part of the front end of the ribbon to the paper shaft on the ribbon rewinding shaft.
10. Roll the ribbon take-up shaft in a clockwise direction, so that the transparent part of the front end of the ribbon is attached to the take-up shaft flatly until you see the black ribbon. Tighten the ribbon so that there are no wrinkles on the ribbon.
11. Press down the print head holder, and wind the label roll in the opposite direction to keep the label paper in a tight state.
12. Close the top cover and press the paper feed button until the connection indicator lights up green.
Comments
Post a Comment